Detecting Surface Cracking in Gears to Extend Their Useful Lives
Gears have been around for a long time. They are used to multiply force and change the rotation axis, and they are found everywhere—from heavy machinery to precision instruments. For safety and life-cycle considerations, mission-critical gears must be inspected regularly for surface-breaking cracks.
The Challenge
- Develop an alternative to MT, PT, and UT to reliably inspect gears for surface cracking.
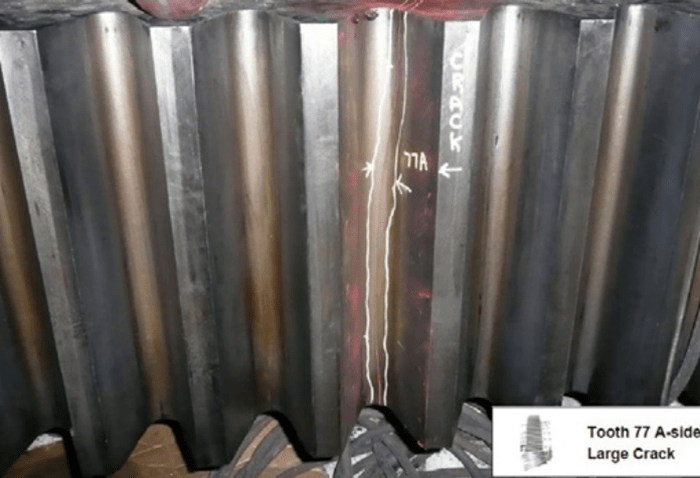
Over time, gear teeth are prone to surface cracking because of the constant torque they are submitted to. Surfacebreaking cracks are typically found in the addendum, dedendum, and fillet of gear teeth, although they can also occur elsewhere.
Depending on the size and type of gears, they are usually tested for defects using a variety of techniques, most notably magnetic-particle (MT), dye-penetrant (PT), and ultrasonic (UT) testing, or any combination of the three.
MT and PT are time-consuming, can easily miss small defects, and only offer crude repor ting/record-keeping capabilities. Moreover, they are messy and require pre-inspection and postinspection clean-ups. At best, these two testing methods can help detect the existence of flaws, but they only offer rudimentary length information.
UT, on the other hand, is faster than the above two inspection methods, but because of the near-surface “dead zone” intrinsic to the technology, it is somewhat blind to surface-breaking cracks. UT also requires couplant, also making a postinspection clean-up necessary.
A better inspection method was therefore necessary, one that would:
- be more sensitive to surface cracks;
- be capable of scanning the addendum, dedendum, and root of a gear tooth in one pass;
- take less time to perform than MT, PT, and UT;
- be capable of reliable surfacebreaking crack detection and record keeping;
- be easy to handle by gloved operators, in a dirty environment.

The Solution
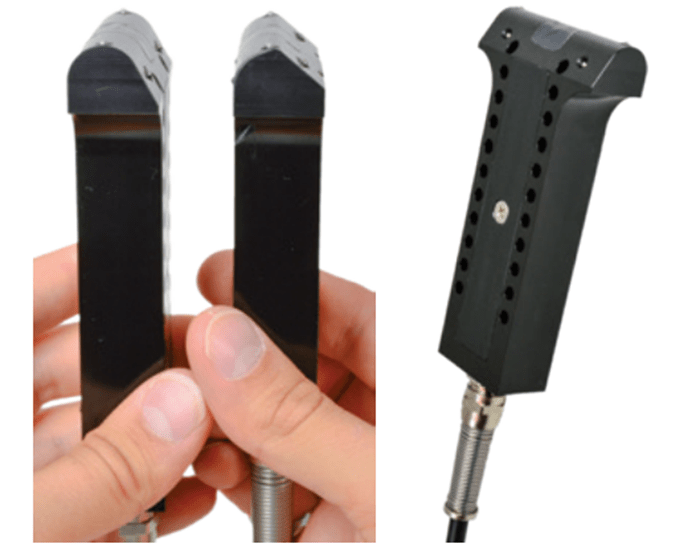
- Compact ECA probes designed for gear teeth profiles, that are rugged, and easy to handle.
Eddy Current Testing (ECT) is an electromagnetic technique well known for its surface-breaking crack detection capabilities. Eddy Current Array (ECA) technology is the next stage in ECT evolution. It is already being used in the aerospace and nuclear industries, among others, for its capacity to quickly scan surfaces and accurately detect surface-breaking defects.
ECA technology uses multiplexing—several individual coils are grouped together in one probe and excited sequentially—to eliminate interference from mutual inductance and to enable scanning wider areas.
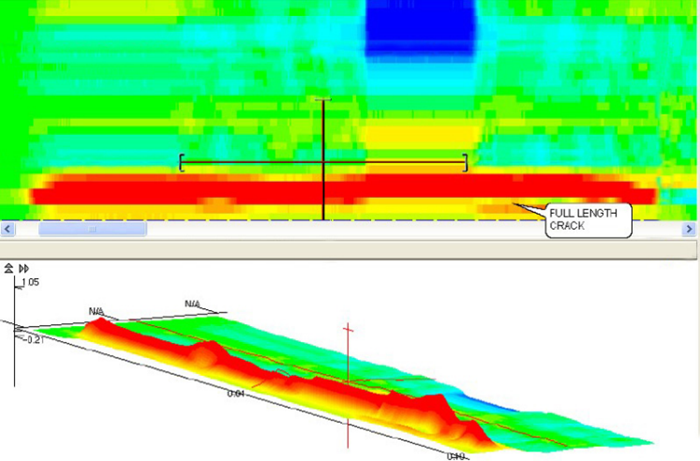
Grouping multiple coils also gives the acquisition and analysis software the ability to display data in the form of 2D and 3D C-scans. C-scans obtained with ECA technology are much simpler to analyze and much more accurate than other display methods. The software’s high-performance acquisition and analysis capabilities make computerized record-keeping and reporting possible, which are also great advantages over other inspection technologies.

Because gear tooth profile shapes and sizes vary greatly, they usually require a custom profile or an adjustable solution. Such solutions minimize liftoff, increasing probe sensitivity. The ECA technology used in the solutions remains, nonetheless, similar.
Profiled probes are equipped with retractable ball plungers to minimize wear and their shape makes handling easier, even with gloves. The probes can also be opened, making them a cinch to repair, if necessary.
Adjustable gear probes, on the other hand, are designed to mold to complex geometries, making them perfect for one-pass examinations of gear teeth, pinions, and other smooth, curved surfaces, while still being easy to handle.
Driving gear probes is Eddyfi® Ectane®—a compact, rugged, batteryoperated, and portable ECA data acquisition unit with an integrated multiplexer.
The solution complies with ASTM standard E2905, now recognized by insurance companies.

Benefits
- Higher sensitivity to surface cracking than MT, PT, and UT, with reliable computerized record-keeping capabilities.
Eddyfi Technologies gear inspection solutions offer several advantages over other solutions on the market:
Faster inspections
Higher sensitivity to surface-breaking cracks
Easier interpretation with C-scan imaging
Only pre-inspection clean-up necessary—save several person hours
Easier manipulation
Complete, computerized data recording and archiving capabilities
Whether you need to inspect small or giant gears, Eddyfi will always deliver a solution adapted to your application.
Over the years, Eddyfi Technologies has gained a wealth of concrete experience developing eddy current array probes for a wide variety of applications. By coming to us with specific application requirements, you’re not starting from scratch. Rather, you have a great head start.