Floormap®X is the latest multi-technology MFL Array tank bottom solution from Silverwing. It offers an unmatched probability of detection – including in the critical zone – and can address thick plates and coatings brilliantly. Thanks to patented STARS technology, it provides top/bottom corrosion discrimination. Blazing fast, it can either be used in full floor mapping or Freescan™ mode. FloormapX increases your efficiency when inspecting tank bottoms like no other system.
Details
Benefits
- Maximum coverage, including critical zone
- High-resolution for increased Probability of Detection
- Multi-technology for top and bottom defect discrimination
- Flexible scanning, one scanner with three scan modes
- Inspect thicker plates up to 20 mm (3/4 in) thick
- Unmatched reporting, comprehensive and on-the-spot
- 10% reporting thresholds, increase inspection intervals
- EEMUA 159 and API 653 compliance
Multi-technology Array Solution
MFL Array: 64 channel, 128 multi-orientated MFL sensors, configuration. It produces a highest resolution imaging and market leading Probability of Detection (PoD). On its own, MFL cannot differentiate if the corrosion is top side or bottom side of the tank bottom.
STARS: The patented technology enabling the FloormapX to differentiate between the top side and bottom side corrosion and report them separately. STARS also generates detailed top surface image profiles, even in the presence of coating, thus contribute to vital tank integrity information.
More Power for Thicker Plates and Optimal PoD
The advanced bridge design, inclusive of the most powerful rare-earth magnets, injects up to 30% more magnetic flux into the inspection surface compared to previous models. This, combined with an exceptional signal-to-noise ratio, allows the FloormapX to detect smaller defects and for the first time inspect tank bottoms up to 20 mm (3/4 in) thick with a high sensitivity. The magnets can also be controlled and set to an ‘off’ condition for easier, safer handling, cleaning, and transportation.
Maximum Coverage, Critical Zone Included
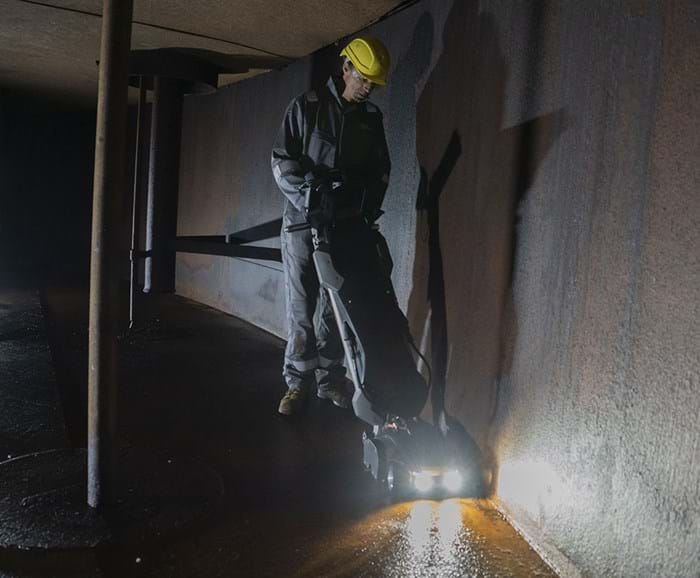
Precision active steering facilitates the inspection of the critical zone to within 12mm (1/2 in) of the shell wall ensuring the FloormapX maximizes coverage in the most important areas. Its reduced profile and the ability to tilt the handle also allows for increased coverage under pipework, allowing for a more comprehensive inspection.
Features
Precision active steering:
For fast, high-quality curved scans in the critical zone and elsewhere. It drastically reduces dead zones by placing sensors where they are needed most: within 12mm of the tank shell. Comes with the capability to return to straight-line driving at the simple push of a button.
Interactive laser guide:
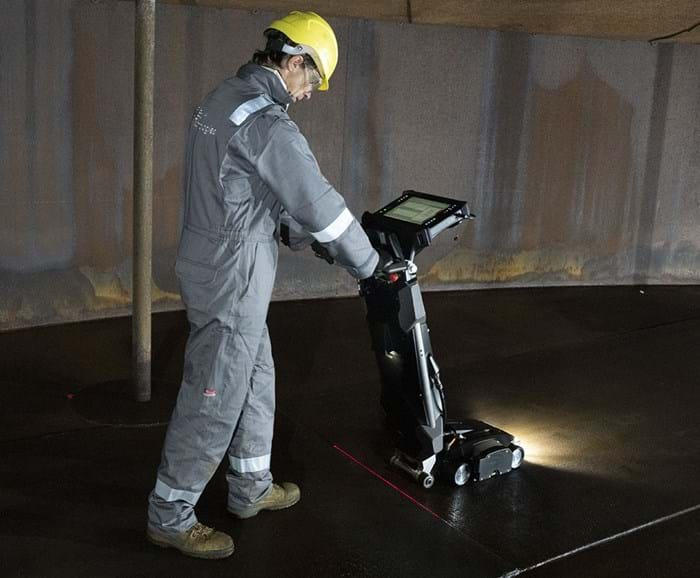
Marking the floor while you map is now fast and easy, thanks to laser-assisted defect location. The laser line is simulated live in the C-scan, allowing to correlate the physical location of tank floor defects with C-scan indications.
SmartMAGNET™:
Variable automated magnetic flux strength for optimized inspection performance depending on plate thickness. Besides, literally turn off powerful rare earth permanent magnets for easier placement during critical zone inspection, storage and shipping, and safer handling.
Adjustable bridge height:
Reach maximum sensitivity where conditions allow, and easily raise the bridge to scan even in the most challenging conditions, such as undulated plates, repair plates and lap welds or when surface preparation is not ideal.
Onboard powerful lighting:
Front dimmable, focalized LEDs, with diffusing lens and rear LEDs. Based on chip-on-board technology providing high and uniform intensity, inline with API recommendations for visual inspection, to perfectly highlight product-side pitting and scan obstacles.
Easy-break™:
Optimized design for intuitive and ergonomic breaking of the magnets by operators.
Inspection Flexibility with 3 Scanning Modes
Mapping: A comprehensive inspection with full auditable data sets. Interrogate inspection data while in the tank or use the dedicated PC-based SIMS PROTM analysis and reporting software. During a scan, the operator can see the live data for both top and bottom defects.
FreescanTM: A simple, fast detection mode, leveraging all of the underlying technology for the best possible result. A quick way to locate corrosion. Scan in any orientation, with no need to measure plates
Pause on defect: A new feature built into both mapping and Freescan modes. Allows the scanner to pause during a scan for defect mark-up or prove-up. Continue the scan without missing a step; the data will be seamless.
Owners of previous generations of Floormap?
Read this End of Active Life notification.
Software
SIMS GO - Data Acquisition
An intuitive software designed to increase workflow efficiency and produce accurate and comprehensive tank inspection data.
With a streamlined interface and operation, operators can select pre-planned workflows or create their own for both mapping and manual modes.
A first for the Floormap are real-time Live scan displays during acquisition. An operator can see live MFL Array and STARS C-scan images. This feature combines seamlessly with an ability to pause the scan and use the laser-assisted defect location feature for rapid and precise defect location and identification: prove-up times have never been so fast. Once proven, the operator can update the automated and editable indication list leading to a paperless reporting strategy.
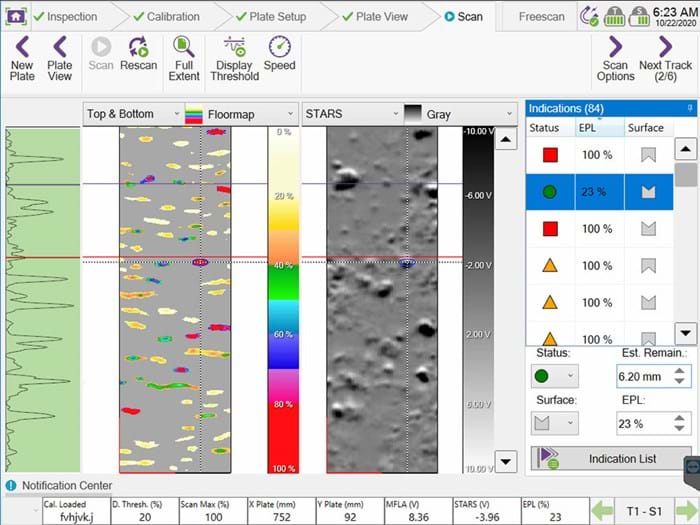
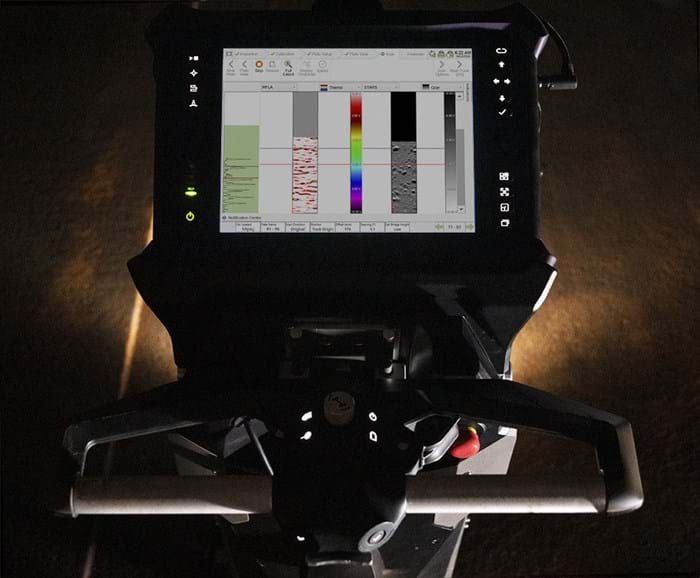
With a minimal software button click approach, operators spend more quality time scanning. An Ergonomic hardware thumb button allows operators to stop a scan, move to the next track, then start a scan without removing their hands from the drive handles or touching the tablet.
Once the inspection is complete, the removable tablet contains all the required data to produce a customizable report in accordance with EEMUA 159 and API 653 recommendations.
SIMS PRO - Reporting and More
SIMS PRO has been developed with customer feedback and engagement to provide a reporting solution that adheres to the modern inspection demands including those outlined in EEMUA 159 and API 653.
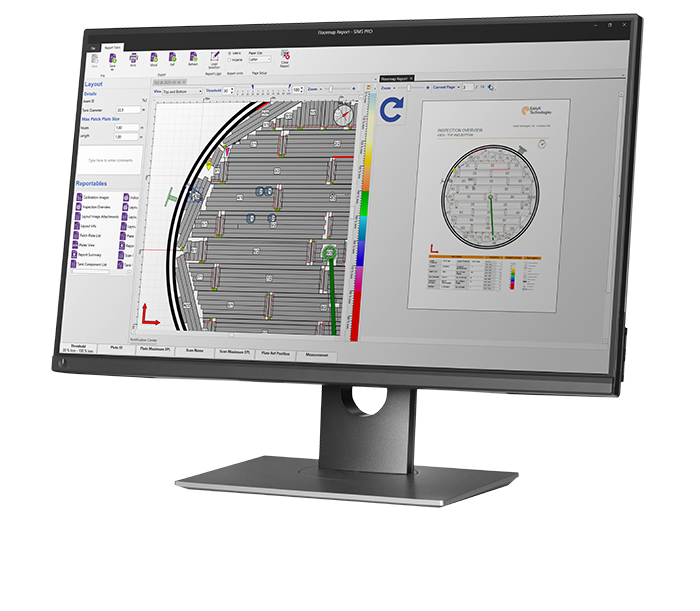
Seamlessly integrating with the FloormapX, SIMS PRO automatically displays the inspection data in an intuitive and immersive manner to provide a clear condition image of the tank bottom which is essential for devising optimal maintenance and repair strategies.
The FloormapX system combines seamlessly with SIMS PRO software suite to deliver detailed, high-quality inspection reports in the shortest possible timeframe.
Exclusive Content
Better Inspection Data Means Better Tank Management | Tank Storage Magazine | Summer 2021
Stuart Kenny explains the benefits of magnetic flux leakage systems for tank floor inspections in this technical tank inspection article.
Workshop Floormap X - the next generation in tank floor inspection
In this workshop, experts Matthew Kircough and Matthew Boat offer a first look of the multi-technology Magnetic Flux Leakage (MFL) Array tank floor inspection solution aimed at increasing productivity.
We Move Forward Together | Storage Terminals Magazine | Autumn 2020
Business unit manager, Stuart Kenny, and product manager, Matthew Boat, discuss how a culture of 'forward-thinking innovation' brought about Eddyfi Technologies' market-leading innovation - the Floormap®X. View the interview in this article.
Getting to the Bottom of Things
In this webinar, NDT expert Lloyd Graham gets to the bottom of things discussing how to identify and quantify corrosion in storage tanks.
This session includes an overview of the state of storage tank facilities in the US today, conventional inspect methods employed, and new technologies available for better detection and characterization of indications ultimately leading to a better inspection workflow.
View now and stay Beyond Current.
Specifications
Array Magnetic Flux Leakage & Magnetic Field Reluctance (STARS)
Yes, using STARS technology
as small as 20%, ø 2 mm (ø 0.080 in)
Yes, if non-magnetic
up to 10 mm (0.394 in)
Variable from 500 mm / sec to 1 m / sec (19.7 in / sec to (3.28 ft / sec)
300 mm (12 in)
up to 263 m² / h (2831 ft² / h)
4-20 mm (0.157in to 3/4 in)
Up to 4 hours
-10°C to 45°C (-14°F to 113°F)
Defect size, × / Y position, plate view, top/bottom, MFL, MFLi, STARS