Inspecting for Cracks in Austenitic Stainless Steel Welds
Ask an expertStainless steel and INCONEL welds are often encountered in the extreme conditions common in the power generation industry because of their good resistance to heat, to corrosion, and to cracking. However, these welds pose unique inspection challenges.
The Challenge
Defect small cracks in 304 and 316 austenitic stainless steel and INCONEL® welds.

304 and 316 austenitic stainless steels and INCONEL (referred to, here, as austenitic alloys) are corrosion and oxidation resistant because they contain chromium, which forms a self-healing protective film on their surface. They are also the most easily weldable of austenitic alloys, so they are therefore widely used in mission-critical assets of the power generation industry. Austenitic alloys are, however, not impervious to cracking, but the assets where they are used usually have a very low tolerance to leaks, whether it be for security (radiation) or efficiency reasons. It is therefore important to accurately detect the presence of cracks in austenitic alloy welds and characterize their severity. Current weld inspection techniques include PT, MT, and pencil ECT probes, and have several limitations:
- They are time consuming. Welds can be very long, so an improved solution must be faster.
- They are highly user dependent. To yield consistent results, an improved solution must not be.
- They may require extensive preinspection and post-inspection surface preparation with chemical products.
- They offer limited traceability, which is crucial for auditing and to monitor the evolution of cracks.
Austenitic alloys usually respond well to electromagnetic inspection techniques, but using them in this type of application poses certain problems:
- Target defects can be very short (length ≈ 2 mm [0.079 in] or less).
- Crack severity must be assessed.
- Welds can be rough, causing premature wear in common surface probes.
The Solution
Adapted, rugged ECA technology that can take on welds and detect small cracks.


Addressing this unique challenge required developing an Eddy Current Array (ECA) probe that could solve the problems of user dependency, speed, and surface preparation.
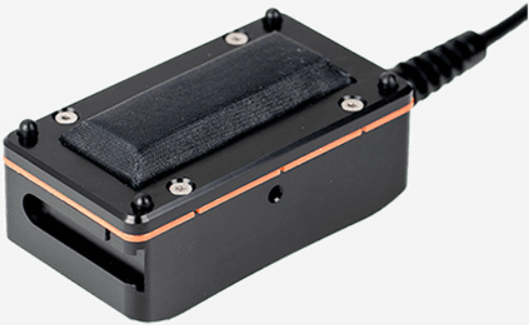
The ECA probe designed to inspect for cracks in austenitic alloy welds uses a padded inspection interface that adapts to all types of geometry variations, in any direction, including heat-affected zones. The probe is also capable of single-pass scans, which makes inspections considerably faster than other inspection methods.
The probe’s interface is also extra tough so that it can withstand friction, considerably reducing the need for surface preparation.
Unlike current inspection techniques, operators can finely tune the frequency of the ECA probe to reach maximum penetration according to the target weld material for peak reliability.
The Eddyfi Ectane® 2 test instrument leverages all the power of the probe with its up to 256 ECA channels.
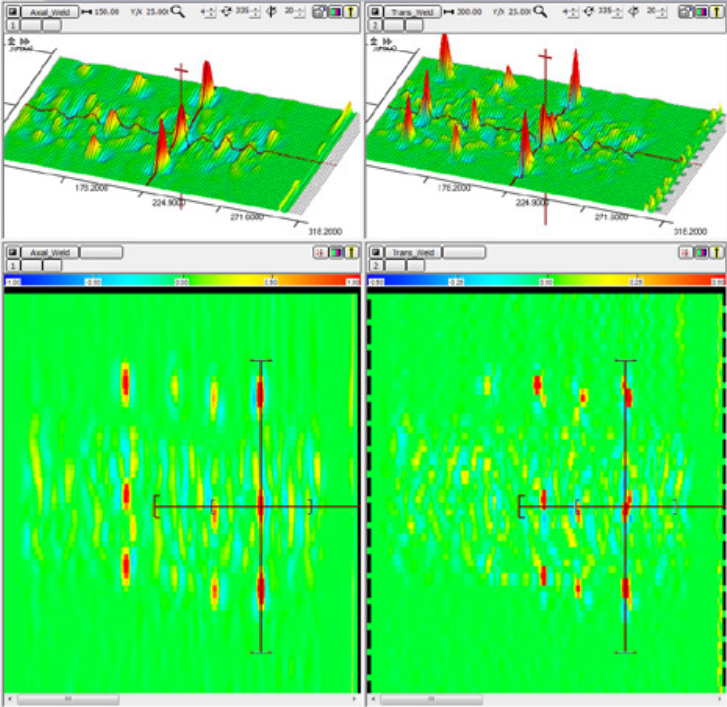
The Magnifi® acquisition and analysis software uses all the data from the probe to reduce characterization constraints through powerful color imaging in C-scans, which helps operators estimate crack severity.
Using customizable color palettes and plotting the encoded position information from each of the probe’s channels gives intuitive, information-rich C-scans. Operators can relatively easily make pass/fail determinations based on these C-scans. The scans can later be saved and used for monitoring purposes, for example.
Padded ECA probes were successfully used to inspect austenitic alloy welds in nuclear waste canisters, but the technology can be adapted to any type of application where inspecting austenitic alloy welds is necessary.
Learn moreBenefits
- Fast and reliable inspections that yield easy-to-analyze data and traceability.
The benefits of using a padded ECA solution are:
Simpler, less operator dependant for more accurate results
Single-pass scans resulting in faster inspection of long welds
Easy-to-analyze results compared to conventional inspection techniques through C-scans and color palettes
Traceability, thanks to Magnifi’s record-keeping capabilities
Little surface preparation necessary